Create CML Project
This page describes how you can start with Context Mapper and create your first CML model. Getting started with Context Mapper is easy, the following four steps will do:
- Install Context Mapper in Eclipse or Visual Studio Code
- Create a project
- Eclipse only: enable the Xtext project nature
- Create a file with the file extension .cml
1. Install Context Mapper
You can use Context Mapper in Eclipse or Visual Studio Code. Find the links to the marketplaces below:
- Visual Studio Code:
- Marketplace: Context Mapper for VS Code
- Open the extensions view on your VS Code (Ctrl+Shift+X)
- Search for “Context Mapper”
- Select the plugin with our Context Mapper logo and press “Install”.
- Note: Does not support all features we have in Eclipse yet. You can find a feature support table here.
- Marketplace: Context Mapper for VS Code
- Eclipse:
- Marketplace: Context Mapper for Eclipse
- Open the marketplace in your Eclipse with the menu entry Help -> Eclipse Marketplace…
- Search for “Context Mapper”
- Press “Install” on the Context Mapper plugin
- Alternatively, you can follow this procedure to install the plugin from update site URL directly:
- Open the plugin installation dialog in Eclipse with the menu entry Help -> Install New Software…
- Enter the following update site URL to the field Work with: on the top of the dialog:
https://contextmapper.org/eclipse-update-site/ - Select the two features ContextMappingDSL and ContextMappingDSL (Sources) and continue with Next.
- Finish the plugin installation by completing the wizard.
- Marketplace: Context Mapper for Eclipse
2. Create or Open your Project
In order to create a CML model, you need to create or open a project/workspace.
For Eclipse users: you can use any project type such as Java Project, Maven Project, Gradle Project or just a general Project. Use the File -> New menu or the context menu in the Project Explorer to create a project.
3. Eclipse Only: Enable Xtext Nature
As mentioned above, it does not matter which project type you use. However, your project has to be an Xtext project, which means it requires the Xtext nature in Eclipse. There are ways to achieve this:
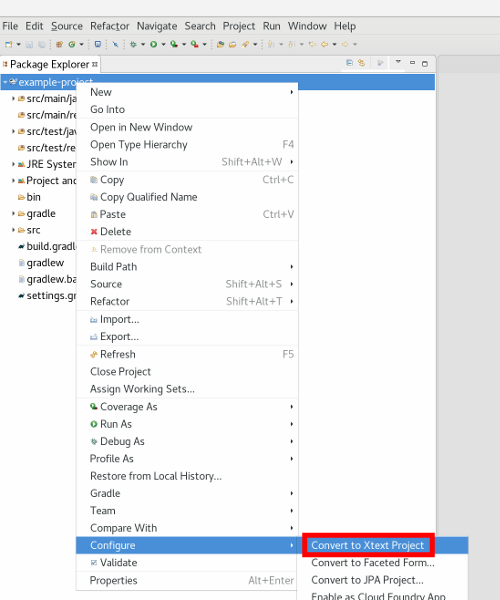
- Option 1: Open the context menu on your project (right-click) and use the menu entry Configure -> Convert to Xtext Project.
- Option 2: Just jump to step four and create a file with the extension .cml. Eclipse will ask you if you want to enable the Xtext nature. Press Yes.
4. Create .cml Model File
Once you have created your project, you can create a file with the extension .cml in order to start modeling with Context Mapper.
Note for Eclipse users: If you already enabled the Xtext nature in step three, the file opens and you can start modeling. Otherwise Eclipse will ask you whether you want to enable it now:
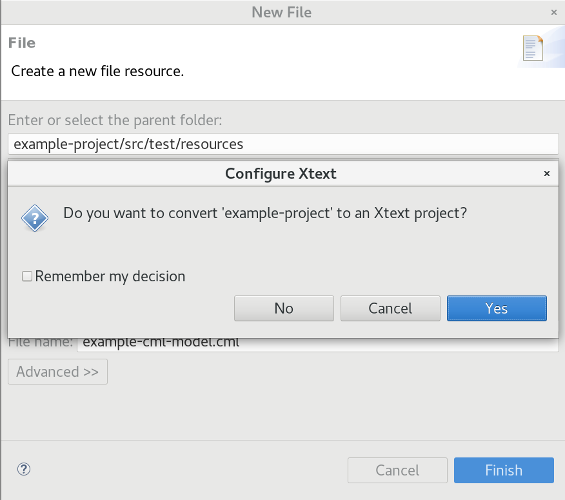
In this case you have to confirm with Yes.
Ready to Model
You can now start writing CML in the Context Mapper editor. Use the following resources to get started:
- Introductory CML snippets on our welcome page
- Sample models in our examples repository
- Detailed documentation about the language features in our language reference section.
- FAQ’s
Note: If you want to model across multiple *.cml files, for example to use Bounded Contexts in multiple Context Maps, consult the Imports page of our language reference.
Once you have modeled your system with CML, you may want use our generators to produce other representations or evolve the model by using Architectural Refactorings (ARs):
- Architectural Refactorings (ARs)
- User Guides for generators: